Monday, June 22, 2020

Peek A Boo!

Hello Everyone! Welcome Back. Today I am featuring these newer stamps sets from The Greeting Farm. There are a handful of designs, 3 little ladies (Anya) and 1 dapper dude (Ian). The neat thing about these sets is that they come with a couple of cute sentiments AND they have a back side to each character. If you haven't already,  I would recommend checking out their website. They not only have clear and rubber stamps- high quality and crisp images- but they have a new litany of digital images that you can create these fabulous scenes with. A lot are perfect for what's going on, from thanking essential workers to working from home. You can even see a tutorial on YouTube on how to create those scenes.
But I digress. I don't own them myself (yet) but I definitely had to get my hands on these lovely ladies for now. With all the social distancing in the past couple of months, I had the idea of these girls peeking through a window to say 'hi' because they miss you! I first tried the layout for Mother's Day to see how it would work. I loved the grey wood panels and I just love pink with grey. I started by stamping Smokey Slate ink on Smokey Slate cardstock with the Woodgrain stamp from Stampin' Up! I then cut a rectangle through the card base and woodgrain layer. I had this window die from a Stampin' Up! Christmas set (retired). It came with a floral window box that I thought would be great for this card. I cut 2 window frames out and added acetate on both. I put one on the inside of the card (to hide my rectangle) and added some 3D adhesive strips from Stampin' Up! to create a shaker with the window. Once the shaker was completed,  I used a variety of flowers and dies from different Greeting Farm and My Favorite Thing sets. Add some pop of color with pieces of DSP and embellishments and it finished the card front off nicely. Then you got your character on the inside peeking out. You could even make this a double page card so you have more room to write a sentiment. I loved the idea of this card so much that I used Crumb Cake and Blushing Bride and Granny Apple Green for the next one for a more mod color scheme. Then, instead of Mother's Day, did a thinking of you/miss you which would be great for someone you haven't been able to see during quarantine.
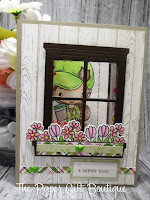
 
 I just love the hat on this girl! Plus her little coffee cup. Wouldn't she be perfect with a coffee gift card? I have so many more ideas in store for her. Now with my new toy (still giddy over the Scan n' Cut) I can avoid fussy cutting her and do the whole front/back thing like these stamps were intended.
The colored plaid paper for both cards is from various packs of My Favorite Things 6x6 packs. The epoxy hearts are from Recollections at Michaels. All coloring was with Copics and the sentiments were from the the retired Family Ties stamp set.

Hope I inspired you to create your own missing  you cards! Thanks for stopping by.

~Brandie~

Tuesday, June 16, 2020

Super Dad

Hey all! Welcome back.
Life is all blending in to itself, I swear. I work, same shift every day. Come home. Chris and the kids are home. Clean. Cook. Craft. Eyes blurring, head swimming. And the weather up here is all dull and wet and I am pretty much just exhausted. 
But then something comes along my desk and whether it's a story idea or card idea, the inspiration just invigorates me. That was the case with these fun fold cards. I got myself a scan and cut (LOVE IT LOVE IT LOVE IT!) and it's made my crafting life so much easier. Now, I haven't been much of a fussy cutter, so I just avoid it and work with stamping straight on my page. Just sucks cuz it limited what I could do and if I ever wanted to build a scene I had to do a lot of masking. But with my new toy, I was able to cut a bunch of images out and just color them- which was easier than I thought it would be.
I had pre-cut a bunch of images from Kindred Stamps for Father's day coming up. 
Unfortunately, all of these images are from sets that have since been discontinued. The heroes were from 2 separate limited edition boxed sets and then the space guys are from Galactic Adventures that have been sold out as well. I would highly recommend following Kindred Stamps for different pop culture icon stamp sets. They are beyond incredible. I have missed out on a few and have kicked myself.
Anyways, I digress. I had cut and colored a bunch of images out for Father's day cuz, well, the father of my children is a big nerd (and I love him for it). I figured he's not the only big nerd in the world, so I should prepare myself.
After cutting and coloring I was left with....now what? I had a few go-to's that were popular last year (stay tuned!) but I also like doing different things and challenge myself. I found on Pinterest something called a W-fold. I thought it would be fun to create something that looked very comic-esque and wound up coming up with these.

I was able to cut out the letters from my Scan and Cut. I need to work on my measurements a little bit better, I wanted to do a shadow effect. It's not perfect close up, but it does the job. I found some Super Hero paper from Recollections and downloaded a free font from 1001fonts.com called Crimefighter. It's not cheesy like comic sans and works really well for that Comic look. Then at the bottom I stamped and embossed the cityscape background from the retired You're Super set from My Favorite Things.
Then you open this simple front of the card and BAM! - we have the W-fold into a lovely comic themed 3D layout.
I also used the same font and sized it so it would fit the POW die cut that matched the You're Super set. I cased the idea that has been all over Pinterest for Father's Day gift ideas and just wrapped it up into a card form.
Here's a few different angles for you to see just how fun this card is.

Well that's it for me tonight. I hope you've enjoyed. Thanks for stopping by!

~Brandie~


Tuesday, June 9, 2020

Floating Florals

Hey guys! I'm back after a month's hiatus. I really didn't mean to be gone that long, but sometimes you need a social media break, especially with everything going on in the world today. That and getting accustomed to a new 'normal' with the kids not being in school, husband being laid off, and focusing on crafting crafting crafting (and occasionally writing).
That being said, I hope to combine the two now that I have so many items to showcase.
I found this wonderful technique from the amazingly talented Jennifer McGuire. Her tutorial can be found here: https://www.jennifermcguireink.com/2018/12/floating-die-cut-frames.html
and though I don't know her personally, or professionally, I have followed her awhile now and I completely blame her for my new obsession with the company Altenew (and most others I haven't heard of and now need ALL their products!)
So not only did I get myself these Totally Tropical stamp and die sets, but I just had to CASE this technique for myself.
The awesome thing about this technique is that, though it can be a bit tedious, you can make a bunch of cards at once, and with the floating technique, you can also do an outer frame and inner piece and get 2 cards for one.
The stamp set is a layered set and I used different color families for each flower. I found this part the most tedious, each floral had at least 3 layers and I did a bunch at once to make a lot of cards. I believe this netted me 5 frames which, in turn, became 10 cards. To stamp that many flowers, especially when they are layers, it's best to have a stamping tool. I have a Stamperatus from Stampin' Up! and I know a lot of people use and swear by Misti.  If you don't have one of these tools, I would highly recommend that being your next purchase. It was so easy to line up each layer and just stamp, rotate the page, stamp, rotate. Then you line up the next layer and stamp, rotate ect. Then going ahead and cutting each piece out with my Big Shot. Again, for ease you could always scan and cut if you have one of those machines. When it comes to stamps with dies, I really like doing it the old fashioned way myself. So long as I don't have to fussy cut!
Now that we are done with the most time consuming part, we head into the more intricate part. Using a 4.25 x 5.5 base (or smaller if you wanted to layer it- mine are 3.75x5), you then take the pieces that you've cut out, cover the entire base with out overlapping any of the pieces. This is where it gets fun, and tricky.
You'll need a kitchen item- Glad Press and Seal NOT cling wrap, but the press and seal (its important). Press a piece of Press and Seal over your piece/base combo, carefully so as to not shift the pieces too much. Press all over and hard enough so you are sticking it to the pieces and the base. Then trim the overage (the Press and seal and all the pieces that hang over the edge of the base). I like to press the Press and Seal against the pieces again to make sure they are good and stuck, then peel the base away and set it aside. I keep my pieces/Press and Seal upside down and set it on my Big Shot. I then use a basic shaped die (I used the rectangle from the Geo Frames set from Altenew) and just cut through the pieces and the press and seal. You'll carefully peel the die away and gently place the 2 separate pieces down- you'll have a 'frame' and a 'center'. Then using some 3D adhesive (I like stampin dimensionals) place a bunch down on every single piece, but leave the gaps empty to achieve that floating illusion. I find I am not very good at lining up the frame with the base, so I don't bother turning the frame over, but I place the base along the frame while it's still upside down so as not to shift or screw it up (I've done that before). Then when the frame piece is adhered to the base piece, flip it back over and peel away your press and seal. VOILA! you now have a floating frame!
Another technique I learned was to cut a bunch of layers of a sentiment (like the YOU here from Crazy About You from Stampin' Up!- now retired). I cut 4 or 5 of them out, used a glue pen to glue them all together and then they were about the same height as the frame. Add some Stickles and Wink of Stella and you're done! The solid frame above was just framed with some cardstock layers and then used the THANKS sentiment from that same stamp and die set.
The color combination is Mango Melody, Melon Mambo and Bermuda Bay- all available from Stampin' Up!
Make sure to swing by and check out their NEW in colors- now available for the 2020-2022 season.

Thanks so much for stopping by, hope you were inspired!

~Brandie~

Thursday, April 30, 2020

Welcome Home

Hey everyone. Hope you're all well. For all my card crafty followers I hope that you are taking some time to craft and be creative. If not, that's okay. Do what you need to for yourself. For me, I need to be creative to be sane. It lets me pour it all out into something. But then, I too have days where I have zero inspiration and want to do nothing. It's all about balance and every day is a new normal we all have to find for ourselves. It's sure not easy, but I really do hope you all manage.

Speaking of normal, people still are out doing things- even differently. I have a friend who's parents are moving so she commissioned me to make a housewarming card. I saw a few different ones on Pinterest that followed this layout.

I loved how the die cut houses peeked over the window. I used the retired Hearts Come Home dies from Stampin' Up and cut the few houses I wanted. I created a window from a label die I had and sandwiched a couple of acetate sheets between the top layer and base layer to create a shaker for the window. I trimmed the hearts come home stamp from the set and took off the 'Christmas' at the end of the sentiment- and it worked! I added some die cut hearts and the Hello sentiment from the Hello You set from Stampin' Up!

Here you can see the fun sequins I added in red and black and then some gold stars from a glitter combo pack I got from Michaels. Finish it off with some paper elements and some twine and voila- done!
To create the window I had my card base and layer lightly adhered and put them through my die machine at the same time. I then added the acetate to the back of the front, and the front of the card base- cutting the acetate about a quarter of an inch smaller. Then I put some Stampin' Up! 3D adhesive strips around the the window on the card base so I could line up the top layer and the bottom layer after I put the filler in.

That's it for me tonight, I hope you're all inspired!
~Brandie~

Monday, April 20, 2020

Video Game Brothers

Hey all! Happy Spring :)
It has been beautiful weather the past couple of days and the snow is FINALLY melting. The bad news is flooding though, all my walk paths are huge puddles. But spring is finally here and I am so happy. Despite the pandemic still in the world, I am able to go for walks and enjoy the weather. It isn't easy to look on the bright side or to see blessings when there is so much negativity, but for myself, those small things can help me look to a brighter future.
These cards are a couple months old. I whipped them up for my son's Valentine's day cards (which was the last week he had of school).
They came together pretty quickly once I had an idea. I love making my own invites/Valentine's/any holiday cards and favors for the kids at school. Matt was my 'surprise' baby so he came after the older 3 by a few years. My 'stay at home mommy' phase was focused on the older three when they were  younger and I would do every holiday all out. Poor Matt got the short of the stick there. Store bought (GASP!) cards weren't unheard of while I balanced work and mom life. As I mentioned before, I am now working at an amazing place that not only feeds me mentally and doesn't wear me down like previous jobs, but I can afford to be part time which gives me more time to focus on my crafting.
But still, need to find something that is quick and simple when I need to bust out 16 or more for a class room ;)
These are all single layer cards matted on a scalloped base. I didn't add any embellishments or do any fussy cutting or die cutting so the most time consuming thing was doing the image coloring, and then doing the masking so I could create the video games scenes. These are "Video Game Brothers" from the amazing Kindred Stamps. I adore their pop culture stamps that everyone just knows to see and the fans just go nuts over. The inking was done with Tim Holtz distress inks and My Favorite Things background stencils. And the thing is, these would work for any sort of occasion to let someone know you love them and are thinking about them. Which, in this day and age, would be greatly appreciated.

Hope you all are inspired!

~Brandie~

Thursday, April 16, 2020

Pretty Puppies

Hey all!
Like I was saying yesterday, I am in love with Spring colors and florals. I do like winter, but only around Christmas. I deal with it in January and then we get, what we Northerners affectionately call 'false spring' in Feburary followed by 'second' (and sometimes third or fourth) winter. This happens in March and April. It's not uncommon to have snow on May Long. Definitely not uncommon to have snow during Easter.
I am officially over it. Though I am born and bred here in Grande Prairie, Alberta, and I don't see myself ever leaving (home IS home after all), I am still over it.
So I boycott our prolonged winter with bright colors, fun stamp sets, 'summer' food (cooked indoors lol), and wearing capris and letting my legs get a bit chilly.
So when I pulled out my bunny stamps from Whimsy, I found my Naughty Puppies set from them as well and couldn't resist creating some fun, spring time cards.
I decided I would start doing a Sketch Challenge and color combo challenge to keep my designs fresh and help when I am a bit stumped on a design. I love doing different fun fold and interactive cards, they are big hits with my customers, but when you have a beautiful image as a focal point, sometimes it's nice for it to be just that; the focal point.
Here's the sketch that I found on Pinterest:
I used Bermuda Bay, Mango Melody and Smokey Slate as my palette. The designer series paper were from some stacks I had gifted to me so I am unsure of the names of them. I found as close as I could to the Stampin' Up! ink colors. The Sentiments are from Gina K Designs For the Grad wreath builder stamp set. And I was a bit addicted to creating my own mini blooms with some various flower builder dies from Spellbinders. I inked the flowers with Distress Oxide Ink from Tim Holtz-  Ripe Persimmon and Broken China. Love the bold color combo and how they light up the card. I had a lot of fun using a sketch challenge and it made creating this card a lot easier. Look for more sketch and color challenges in the future.

Please feel free to follow me at crafterseden on Instagram to see what I am working on next!

~Brandie~

Wednesday, April 15, 2020

Easter Blessings

Hey everyone.
With Covid going on it was easy for me to have time fly by and not realize what day it is. I have been working, so I am aware of dates but Easter crawled up on me. I had plans to really expand my business this year and to do spring shows with Easter items, Mother's and Father's Day and weddings and grad. It seems with the way the world is right now, everything has been cancelled. It hasn't really, but sometimes it was easy for me to get in a funk and think 'Why Bother?'
But I should bother. We should all bother. In a safe way we should be bothering. So I got out of my funk and am working on the rest of the upcoming spring holidays and going digital. I will miss doing the outdoor markets at my local Farmers Market this spring and I'll miss the face to face with people, but I can still make beautiful things and inspire and make people's day.
I still did some Easter items - we are FINALLY melting the winter snow up here in Northern Alberta so I really wanted to do some fun, spring floral patterns and colors.
These images are from Whimsy Stamps. They are absolutely adorable. I really like how detailed they are and own quite the collection. These bunnies are perfect for Easter!
After coloring in the images, I really wanted to use that bold teal and fuchsia so I used Stampin' Up!'s Bermuda Bay and Berry Burst to stamp some florals from their Sale a Bration Thoughtful Blooms stamp set. I matched that with more bold colors- Highland Heather and Mango Melody on a Crumb Cake stamped Woodgrain background. I love how the colors pop and just scream Spring.

The next little bunny was completed yesterday, so after Easter came and went. I just did it as a simple thinking of you card. I framed the image on a glittery piece of cardstock cut in a cut out scalloped circle. I based it on a die cut piece of Whisper White that I cut out using Floral Phrases thinlits from Stampin' Up! I layered it on a piece of vellum and finished it off with some sheer ribbon. Very simple, and yet very pretty.


Carrying on with the Easter theme, I brought back the idea of lollipop cards. I like calling them ''picks" or "piqs" because they would be perfect as a little 'pick' in a bouquet or peeking out from a gift bag. I used the same images from Whimy Stamps: The Bunny in a basket is: Bonnie and the Bunny on a branch is: Springtime. I used Stampin' Up!'s retired Floral Frames framelit dies for the base. I mounted the images on slightly larger circles cut out from glitter cardstock and finished them off with some sentiments printed off my computer on Whisper White Cardstock. Add some wonderful sheer and thin ribbon from Michaels, handmade flowers from Spellbinders floral dies and attach on paper straws and you're done!
I don't know about you, but the bursts of colors and florals is enough to bring me out of the dumps and hope for a future soon where we could all get back to normal.

Until then, stay safe and healthy and inspired.

~Brandie~